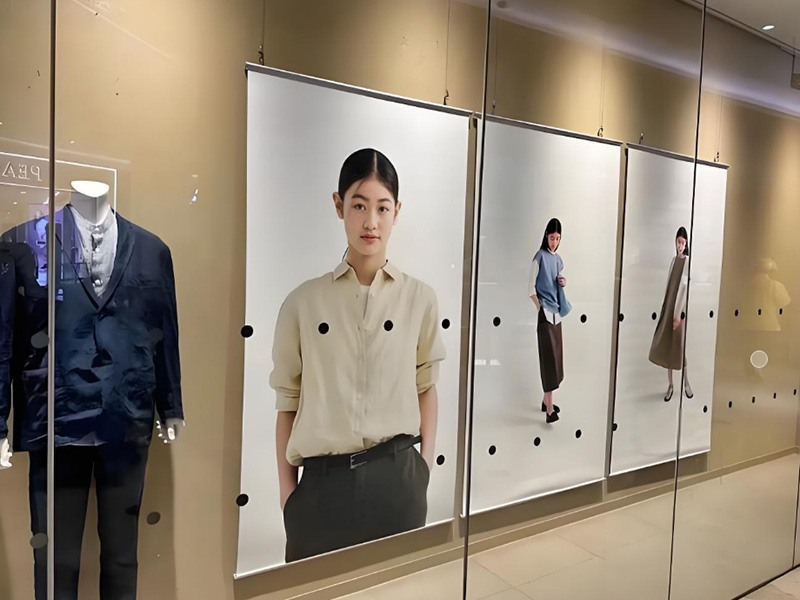
When making large prints, it’s essential to choose the right resolution, as both resolution and DPI play a crucial role in determining how clear your print will look in the end. If the settings are incorrect, prints may appear blurry or blocky, especially when viewed up close. For most large prints, a good DPI range is between 150 and 300, depending on the size of the print and the distance from which people will view it.
Here’s a simple guide to follow:
Pick 240 DPI for medium prints, like 24×30 inches.
For very large prints, 180 DPI usually works fine.
Research indicates that lower DPI can be effective for large prints since viewers typically see them from a distance. For instance, 75 DPI can be suitable for full-size prints. Massive designs over 150 inches may require resizing. By choosing the right resolution, you ensure that prints remain clear while avoiding excessively large file sizes.
Key Takeaways
Pick 300 DPI for prints 16×20 inches or smaller. This keeps details clear.
Use 150 DPI for medium prints like 24×30 inches. It balances quality and file size.
For big prints seen from far away, 75-180 DPI works well.
Match your image resolution to the printer’s DPI. This prevents blurry prints.
Check your images with proofs to find errors before printing.
Understanding Resolution and DPI
What is Resolution
Resolution shows how much detail an image has. It is measured in pixels, which are tiny squares that form the image. More pixels mean higher resolution. For example, an image with 3000×2000 pixels has 6 million pixels, or 6 megapixels. Higher resolution makes images sharper and clearer, especially when printed larger.
When making large prints, the resolution must match the print size. If the resolution is too low, the image will look blurry or blocky. This is why knowing about resolution is important when choosing settings for your project.
What is DPI
DPI stands for dots per inch. It measures how many ink dots a printer places in one inch. Higher DPI, like 300, makes prints sharper and clearer. For large prints seen from far away, lower DPI, like 150, often works well.
DPI is not the same as PPI (pixels per inch). DPI is about printing, while PPI is about digital images. For example, screens show images at 72 PPI, which is fine for online use but not for printing. DPI and PPI must work together for good print quality. A high PPI image cannot go beyond the printer’s DPI limit, so matching them is important to avoid problems.
Application Type | |
|---|---|
High-quality prints (e.g., flyers, brochures) | 300 DPI |
Standard prints (e.g., magazines) | 150-300 DPI |
Digital viewing (e.g., websites, emails) | 72 DPI |
How Resolution and DPI Work Together in Printing
Resolution and DPI work together to decide print quality. Resolution shows the image’s detail, and DPI controls how it looks on paper. For example, printing a high-resolution image at low DPI can make it look blurry. Printing a low-resolution image at high DPI can make it pixelated.
To get the best results, balance resolution and DPI based on print size and viewing distance. For large prints, 150-300 DPI is usually best. This range keeps prints clear without making files too big.
Tip: Match your image resolution (PPI) to the printer’s DPI. This avoids quality problems and makes your prints look professional.
DPI Standard | Description |
|---|---|
300 DPI | Best for high-quality print results. |
Higher DPI | Adds detail but may not improve quality much. |
By learning how resolution and DPI work together, you can pick the right settings for large prints. This helps your final product look great and meet technical standards.
Factors That Affect Large-Format Print Quality
Image Resolution and File Size
The resolution of your image decides how clear your print looks. Higher resolution means more detail, which is great for large prints. But, high-resolution files are bigger and take up more space. They can also slow down your computer.
To get good quality without wasting space, match the resolution to the print size. For example, a 24×36-inch poster needs at least 4320×6480 pixels at 180 DPI. If the resolution is too low, the print will look blurry. If it’s too high, the file will be unnecessarily large without improving quality.
Tip: Save your files as TIFF or PNG to keep the image clear during editing and printing.
Printer Type and Technology
The printer you use affects how your print turns out. Different printers have different strengths:
Digital Printing: This is quick and cheap, good for small projects. But the prints might fade over time.
Screen Printing: This method makes bright, long-lasting prints. It’s great for logos but uses chemicals that can harm the environment.
Offset Printing: This is best for big jobs and works on many materials. However, the chemicals used can sometimes lower print quality.
The ink and material you pick also matter. For outdoor prints, use UV-resistant ink and strong materials like vinyl or fabric to make them last longer.
Viewing Distance and DPI Needs
How far people stand from your print changes the DPI you need. For close-up prints like posters, use a higher DPI (240-300) for sharp details. For big prints like billboards, a lower DPI (75-150) works fine since they’re seen from far away.
Example: A billboard seen from 50 feet doesn’t need as much detail as a poster seen from 2 feet. Adjusting DPI based on distance keeps quality high and file size small.
By thinking about these factors, you can pick the best settings for clear, professional prints.
Choose the Right Resolution for Large-Format Prints
Recommended DPI for Common Print Sizes
When picking the right DPI for large prints, think about the print size and how far people will stand from it. Smaller prints, like posters or magazines, need higher DPI because they are seen up close. Bigger prints, like billboards, can use lower DPI since they are viewed from far away.
Here’s a simple guide to help you choose the right DPI:
Print Type | Recommended DPI | Viewing Distance |
|---|---|---|
Small Formats | Close viewing | |
Large Formats | 150 DPI | Moderate distance |
Billboards | 30 DPI | Far distance |
Posters (up to 12×18″) | 300 DPI | Close viewing |
Large Posters | 150 DPI | Moderate distance |
Magazines | 300 DPI | Close viewing |
Newspapers | 200-250 DPI | Moderate distance |
Line Art | 800-2400 DPI | Close viewing |
For small prints, use 300 DPI to keep details sharp. For larger prints, like banners, 150 DPI works well. Huge prints, like billboards, only need 30 DPI because they are seen from far away.
Tip: Unsure about the DPI? Think about how far people will stand. The farther away, the lower the DPI you can use without losing clarity.
Calculating Resolution Based on Print Dimensions
To figure out the resolution for your print, know the print size and desired DPI. Multiply the width and height of the print (in inches) by the DPI to get the resolution in pixels.
For example, if you want a 20×30-inch poster at 150 DPI, calculate like this:
Width: 20 inches × 150 DPI = 3000 pixels
Height: 30 inches × 150 DPI = 4500 pixels
This means your image needs at least 3000×4500 pixels for a clear print.
Here’s a table showing how resolution changes with size and DPI:
Print Size (inches) | Diagonal (inches) | Minimum Viewing Distance (inches) | Maximum Viewing Distance (inches) | Minimum DPI |
|---|---|---|---|---|
36 | 54 | 72 | 64 |
Note: Always use images with enough resolution. Enlarging low-resolution images can make them blurry or pixelated.
Adjusting DPI for Different Applications
Different projects need different DPI settings. For example, a magazine cover needs 300 DPI, but a trade show banner looks fine at 150 DPI. Adjusting DPI for each project gives great results without making files too big.
Here are some examples with recommended DPI:
Posters and Flyers: Use 300 DPI for small sizes (up to 12×18 inches). For bigger posters, 150 DPI is good.
Banners and Signs: Medium banners need 150 DPI. For very large banners, 75 DPI works.
Billboards: Since they are seen from far away, 30 DPI is enough.
Tip: Check your printer’s settings before printing. Some printers need specific DPI for the best results.
By adjusting DPI for each project, you can make sure your prints look great and keep file sizes manageable.
Common Mistakes to Avoid
Using Low-Resolution Images
Low-resolution images are a big mistake in large-format printing. If the image doesn’t have enough detail, the print will look blurry or rough. This happens because the image can’t stretch to fit the larger size.
To fix this, check your image’s resolution before printing. Use at least 300 DPI for small prints. Adjust DPI based on the size and how far people will view it. If the resolution is too low, resampling can help improve it. But remember, resampling won’t bring back lost details.
Tip: Start with the best resolution image you can find. Enlarging a low-resolution image makes flaws worse.
Overcompensating with Excessive DPI
Using too much DPI can also cause problems. Many think higher DPI always means better prints, but that’s not true for large formats. Printers can only handle so much detail, and going over their limit just makes files bigger without improving quality.
For example, a billboard seen from far away doesn’t need 300 DPI. A lower DPI, like 75, works fine because people can’t see tiny details from that distance. Using too much DPI wastes time and space without helping the print.
Note: Match your DPI to how far people will stand and what the printer can handle.
Ignoring File Format and Compression Issues
Picking the wrong file format or compressing too much can hurt print quality. TIFF files are great for keeping all the details because they don’t lose quality. PDFs are good for mixing text and images while keeping layouts neat. JPEGs or PNGs work for simple prints, but JPEGs lose quality because of compression.
File Format | Advantages | Disadvantages |
|---|---|---|
TIFF | Keeps image clear, no quality loss | Files are large |
Easy to share, layout stays the same | Harder to edit | |
JPEG | Small file size | Loses quality with compression |
EPS | Can resize without losing detail | Needs special software |
Tip: Use formats like TIFF for top-quality prints. Don’t compress images too much to keep them sharp.
By avoiding these mistakes, your large-format prints will look clear, professional, and impressive.
Tips for Optimizing Images for Large-Format Prints
Editing Images for Clarity and Sharpness
Making images clear and sharp is very important for large prints. You can use special tools like image super-resolution to improve resolution. This method fills in missing pixels, making pictures look more detailed. Sharpness is also key for good image quality. It is measured using Spatial Frequency Response (SFR), which checks how much detail is visible.
To get the best sharpness, aim for a high 50% MTF frequency. This shows how sharp an image looks to the human eye. Here’s a table with helpful techniques:
Technique | Description | Quantitative Assessment |
|---|---|---|
Image Super-Resolution | Boosts image resolution using smart algorithms. | Measures added detail and frequency. |
Sharpness Measurement | Checks detail levels with Spatial Frequency Response (SFR). | 50% MTF frequency shows sharpness. |
Tip: Use editing software that improves resolution and sharpness before printing.
Preparing Files for Printing
Getting files ready the right way makes prints look great. Start with high-resolution images, like 300 DPI for small prints. For bigger prints, lower the DPI based on how far people will view them. Pick the best file format to keep quality high. TIFF files are great for printing because they don’t lose details. JPEG files are better for online use but may lose quality due to compression.
Scanning images at the highest quality you can is important. This way, you can use the same image for different projects, like displays or books.
Tip: Save your files as TIFFs for printing and avoid too much compression to keep them sharp.
Testing Print Quality with Proofs
Testing proofs helps you find mistakes before printing the final version. Proofs let you check colors, sharpness, and overall quality. Print a smaller version to spot any problems. Change settings like DPI or resolution if needed.
Tip: Test proofs under the same lighting as the final display for accurate results.
By using these tips, you can make your images look amazing for large-format prints.
Picking the right resolution and DPI is very important. It helps make large prints look clear and professional. Use 100 to 300 DPI for most projects. For small prints or photos, 300 DPI shows fine details best. For big prints like banners, lower DPI works well if seen from far away.
Tip: Test your images with proofs before printing. This helps catch mistakes and keeps your design looking great. With the right settings, your prints will always look amazing.
FAQ
What is the difference between DPI and PPI?
DPI refers to dots per inch in printing, while PPI means pixels per inch in digital images. DPI affects print quality, and PPI impacts screen resolution. Matching them ensures your prints look sharp and professional.
Can I use a low-resolution image for large-format prints?
Low-resolution images often result in blurry prints. Always use high-resolution images that match your desired DPI. For example, a 24×36-inch poster at 150 DPI needs at least 3600×5400 pixels.
How do I calculate the resolution for my print size?
Multiply the width and height of your print (in inches) by the DPI. For example, a 20×30-inch print at 150 DPI requires 3000×4500 pixels. Use this formula to ensure your image has enough detail.
What file format is best for large-format printing?
TIFF files are ideal for printing because they preserve image quality. PDFs work well for layouts combining text and images. Avoid JPEGs for printing as they lose quality due to compression.
Why does viewing distance matter for DPI?
Viewing distance determines how much detail is visible. Close-up prints need higher DPI (240-300), while far-away prints like billboards can use lower DPI (30-75). Adjust DPI based on how your audience will view the print.